Transforming IGOFARs ST1300 . . . to Shuey's!

More to follow soon
There's yer answer Larry. No mention that I could see about "I'm all done now."

My question, specific to the FZ1, ... how do you know from the box, which devices are switched and which are not?

Thanks.
 
There's yer answer Larry. No mention that I could see about "I'm all done now."

My question, specific to the FZ1, ... how do you know from the box, which devices are switched and which are not?

Thanks.
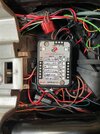
Each of the 6 circuits can be either, depending on . . . how you place the fuse.

Shuey
 
There's yer answer Larry. No mention that I could see about "I'm all done now."

My question, specific to the FZ1, ... how do you know from the box, which devices are switched and which are not?

Thanks.
Column that states C/S.
C= constant power, S = switched power.
You enter the correct value based on how you configured it.
Shuey has left it blank.
 
That fuse box install is the worse job I’ve ever seen! And this is coming from someone who hates doing electrical stuff.
What a mess, not to mention electrical tape? Really?
It could have been done MUCH better, organized, shrink wrap, and wire sheathing.
Damn, what are you letting this guy do to my….our….bike?
No argument from me, but my immediate need/goal was met . . . it all works.
You can make improvements/corrections when I next ride your way. :wink-2x:

Shuey
 
Column that states C/S.
C= constant power, S = switched power.
You enter the correct value based on how you configured it.
Shuey has left it blank.
More pictures on their web site that might . . . enlighten.


Nothing to "enter", constant or switched is determined simply by how you place each fuse.
Inside, where you place the fuses, it is plainly marked with text which side is which.

Shuey
 
More pictures on their web site that might . . . enlighten.


Nothing to "enter", constant or switched is determined simply by how you place each fuse.
Inside, where you place the fuses, it is plainly marked with text which side is which.

Shuey
I know, but you have to remove the cover to see that. He asked how you tell by looking at the fuse block. That is what that column is for- To indicate which is switched and which is constant without the need to remove the cover, which requires a screw-driver.
 
You mean when he removes all your work? :rofl1:

I just want to know what that last "bath light & clear water" fuse is for. Did you add a port-a-loo & hand wash station too? ;)
That would be the auxiliary Clearwater LED lights and . . . the battery power switch light to turn them off when not needed with the bike lights.

Sorry, no loo, still need a back to the road and the wind!

Shuey
 
Last edited:
I know, but you have to remove the cover to see that. He asked how you tell by looking at the fuse block. That is what that column is for- To indicate which is switched and which is constant without the need to remove the cover, which requires a screw-driver.
Ah . . . ok. For the most part, once installed, which item is switched and which constant is . . . self-evident. :giggle:
Maybe I'll mark the cover . . . one of these days. Time will tell.
Shuey
 
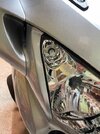
I appreciate the steps you showed with photos. My only concern is the now hanging wire behind the bulbs does not fully seat for a watertight seal at the plug - there is the tiniest gap. For those who have done it, did you wrap it or otherwise try to seal it?
This isn't a very good picture, but the power wire extrudes from the fan housing at the rear the bulb, all of which . . . are outside the rubber boot. As far as I can tell, there isn't a gap and it's a tight weather seal. Also, this bulb does not have an external ballast to find a postion for.

(note: the shrink wrap wire bundle is NOT related to the Cougar bulb, just in the way for the photo. I'd push it out-of-the-way only to have it move back to it's happy spot by the time I pressed the shutter.)
Cougar Headlight Bulb Installed.jpg
 
Tried to answer a few question first, now . . . on with the show.


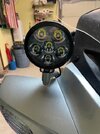
Clearwater Erica Auxiliary Lights

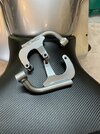
Honda OEM Police Above the Mirror Light Bracket

First, I had the white police bracket painted to match the bike.
Y ST P Light Painted Brackets.jpg

Second to mount the bracket I ordered the needed longer bolts and the rubber mirror weather spacers.
Mounted up, they look like they belong there.
Police Above Mirror Bracket.jpg


Clearwater LED Auxillary Lights
Erica
: 60 watts with 6,000+ lumens (per bulb) drawing 5 Amps at full power.
Y Clearwater Light.jpg

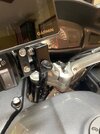
Next as a part of the Clearwater package, the lights have a dimmer controller.
The controller will change the low beam output from approx. 10% up to the max 100%.
- I use the lights set at 10-15% for normal running lights.
- When shifted to High Beam these lights go to 100% to blind deer down the road!
Aux Lights Dimmer.jpg

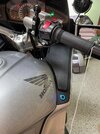
Watsons-streetworks Lighted Push Button Switch (Blue)
Aux Lights Power Button for Erica lights
Not a part of the Clearwater package
Even at a low beam setting of 10%, these lights are still very bright, so . . . this power button turns them off (disengaged from power).
(Look down, it's the blue circle indicating the lights are powered on.)
Y Aux Lights Power Button BLUE.jpg


Superbright LEDs Parking Lights (Marker Lights)
921 LED Miniature Wedge Retrofit
Finishing out lighting at the front of the bike are bright white replacement bulbs for the markers.
Seems like I was told that in the English version of the ST these are switched lights for when parked along the road.
Marker Light LED.jpg


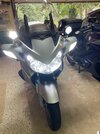
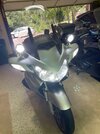
So . . . what does all this add up to? I'll tell you . . . THEY WILL SEE ME COMING!

Front Lights On.jpg

Shuey
 

Attachments

  • Front Lights Brights.jpg
    Front Lights Brights.jpg
    163.2 KB · Views: 4
  • Front Lights Brights.jpg
    Front Lights Brights.jpg
    163.2 KB · Views: 4
Indeed, the extra lumens (I remember when we still called it candlepower) DO look like they belong.

Especially on a rig slated for mile-munching days and throughout the night.

But still... even if you've retired from the IBR (or they retired from you), you can still ride it to Starbucks for the posers to gawk at.

And I'll buy your first cup.

Nicely done, sir, and I don't care what Larry says.
 
Last edited:
I think we've covered the front, so now . . . we move to the back.

The goals are to go 100% LED AND improve visibility to drivers behind me.

NATGIC 7443 Amber Rear Turn Signal LED Bulbs

Alla Lightiing, 7443, TC-A-STR Rear Brake LED Bulbs, Red
- These are red bulbs behind the stock red lenses. Much brighter. (Thanks to Wes for recommending them.)

Oznium LED License plate strip, Cool White, Part #1320
- If you've ever looked UNDER the stock rear brake lenses, you'll see a clear window. This allows the stock WHITE brake light bulb to light up the license plate.
- Since I switched to a RED bulb, the license plate now also would glow red . . . not legal anywhere I'm aware of.
- The fix was to wire in a short lower power LED strip and attach it under the window and, voila, white light for the plate. All's well.
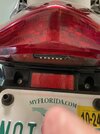
Rear License Plate LED.jpg


H&R Enterprises Hyper-Lites with License Plate Mounting Bracket
- Aux Red brake and amber turn signal lights mounted to the left and right of the license plate.

SWPS.com, Whelen LIN3 Series Super-LED, Red (RSR02ZCR)
- This light, replaces the reflector near the bottom of the fender.
- When brakes are engaged it flashes VERY bright in a choice of patterns. This light is off when brakes are not engaged.
- Typically, you'll see these in the grills of unmarked law enforcement vehicles.

Put them all together and this is what you get . . .

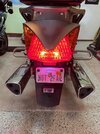
Stock
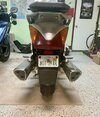
Tail Lights Stock.jpg

Tail lights running
Tail Lights Running.jpg

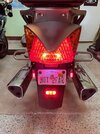
Tail lights while braking
Tail Lights All Lit.jpg


Like the front of the bike, my photos don't do justice to how bright these lights are. So time will tell what . . . other drivers on the road think.

Shuey
 
Last edited:
Matters less what they think, and more what they do.

But you're giving them drivers every opportunity to see you, and that's a good start.
 
Next up . . . heated grips. It was many years ago while sharing some road with Dave Doolin that we discussed adding heated grips to my new 2007 Honda 1300 (the first one, back in 2007). I didn't think much of the idea at the time as that's what I had multiple pairs of gloves for. Right? Did some checking and it turns out they aren't expensive and are easy to install. What the heck, I'll give them a try. I HAVE SEEN THE LIGHT . . . er heat. For those with heated grips, no explanation is necessary. For those who don't . . . it's much easier to press a switch than to stop and swap out gloves as the temp. drops. It just is!

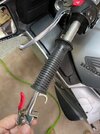
First task - remove the "old" BMW grips (thanks Larry, I'll hang onto them for awhile in case the Kosos don't work out).

Poke a nozzle squirting compress air between the grip and the handlebar and the old grips easily slide off.
Heat Grip - Remove Old Grip.jpg

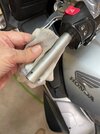
Clean well. I used a little acetone.
Y Koso Cleaning Left .jpg


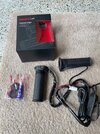
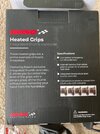
CycleGear KOSO Apollo Heat, Grips, Part #0631-0152

Koso Heat Grip Package.jpg

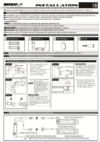
Koso Grip Install Inst.png

Installing the left grip was easy. Because of the smooth shaft I applied a small amount of their provided glue and just slid it on. I used a rubber mallet to tap it on the final inch or so.
Installing the right grip, not as easy since that shaft is nurlled. No glue needed. The tip I got from Koso was to turn the grips on for a few minutes allowing the grip rubber to soften and expand then tap it on. That worked just fine.


Y Koso Grp Specs.jpg
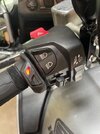
Besides all the safety features, the real beauty of this system is that the controller switch is built into the left grip!
- Easy to install (no additional real estate needed to mount the switch)
- Easy to use even with gloves on.

Switched off
Heated Grip Controller.jpg

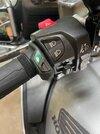
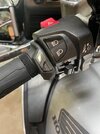
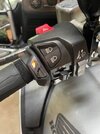
The switch rotates through 5 heat levels starting with the lightest, blue, to the highest a dark red then back to off.

Blue
Heated Grip Blue.jpg

Green
Heated Grip Green.jpg

Yellow
Heated Grip Yellow.jpg

This light actually is viewed as a solid bright red.
Heated Grip Red.jpg

This light actually is viewed as a solid dark red.
Heated Grip Dark Red.jpg

One more click and it's back to "off."

I tested the finished work and they heat up just fine. I look forward to trying them out when they're needed later this Fall and Winter.

Shuey
 

Attachments

  • KOSO Grip Inst.pdf
    731 KB · Views: 1
Last edited:
I have them on my St1100 ,very pleased with them, one note I tend to turn them off accidentally when using the turn signal switch.
 
Back
Top Bottom