- Joined
- Feb 11, 2006
- Messages
- 8,045
- Location
- Jacksonville
- Bike
- GL1800 R1200RT NC700
- 2025 Miles
- 006727
Is the mating surface of the lower tank to the tank access port still flat and in good shape? The rubber gasket should seal minor inperfections.

Yes, i had this problem . It was my own fault , as I pinched the wires between the flanges and it bent the flange on the lower tank quite easily .
I "fixed" it by using a bead of Permatex #2 ( non hardening form-a-gasket ).
Not the best way to fix it and i had purchased a replacement lower tank but never got around to putting it on the bike.
The bike got totaled some 10K miles later so I can't say how the durability would have been long term..
The one I got was the Denso 951-0004 Fuel Pump but not sure what it fits, I'm thinking a Honda Accord. I had to trim the inside of the plastic connector just a tad so it would connect but that was it.
When I did mine, I ordered a new gasket and it leaked... I reused the old one with all the indentions from being installed and it didn't, I just cleaned it real good.
")
Exactly the same symptom I'm having when I get down to 2 bars and it starts cutting out. Happened twice.I had two separate cases of my fuel pump acting up while at 2 bars on the gauge. Symptoms were cutting out/surging while moving, and it wouldn't idle. As soon as I filled the tank it ran perfect. My fuel mileage has also dropped roughly 5mpg since last season. I should admit that I'm one who tests the range of a tank of fuel on a regular basis...and I mean down to the last drop. Yes, I'm a fuel pump abuser. So tonight I ordered a pump from the same source sennister used. I'll update on the install and performance after install.
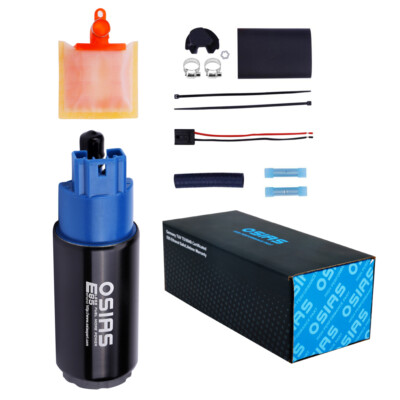
Just an FYI for the thread. I bought the cheapest ebay kit I could find with the "Custom Parts High Quality" brand CSTP-382 HFP-382 pump in the kit. Nothing was used but the pump so it all worked great. I'd link the ebay seller but the item I bought for $18.78 is now shown as $118.78??? So if you want just buy the cheapest CSTP-382 HFP-382 pump you can find and reuse the stock parts.
My bike had 196,800 miles when the pump was replaced. My symptoms where like everyone else, lots of surging when riding the bike. The last ride was a ride home from a trip, 550 miles of the surging but it made it home.
Well my second pump went out last Friday. This one was a lot different. It chugged as in "quit running" for 1/10 of a second twice as I rode down the Interstate at 75 gps indicated. I thought hmmm as it is the first problem I've had with the bike in a LONG time. And then 2 miles later I came up on a Semi and as usual I gave it a little gas to get around him and be done. Well it didn't go, It chugged hard if I gave it the gas at all and then died out but luckily I was just at an exit. So instead of passing I went right and got off the I-10 to check things out.just an update, the pump has worked fine for over 3,000 miles. If you need a spare the ebay site is back at $18.
http://www.ebay.com/itm/161913159070
Edit, 9-29-18 added a current link some are using.
https://www.ebay.com/itm/Fuel-Pump-...013/162545660158?_trksid=p2485497.m4902.l9144
Condition:New
Brand:Keshen
Bundled Items:Gasket, Harness, Hose, Hose Clamp(s), Strainer
Manufacturer Part Number:KS02B
Warranty:Yes
Flow:140-160 Liters per Hour
UPC:683422225666


Handy article for folks!Tonight I replaced my fuel filter and while I was in there I tossed in a new fuel pump. The bike has 94000 miles and I had some bad fuel a while back and have been wanting to replace the filter. A member here mentioned another fuel pump option rather than the entire assembly option that Honda has for $400. The fuel pump motor in the ST1300 is a common automotive pump. I would post the link to ebay but it will be gone soon and just be a dead link the model number listed is:
HFP-382
A Google search of that will result in several options. The kit I bought off ebay was $68. Here is an example of the kit. (note over 400 vehicles use this pump)
High Flow Pump
The one problem with this option is the small sock that attaches to the pump pickup has to be reused. Honda doesn't sell this part. While I was in there I also replaced the Fuel Filter (16900-MBG-013); Filter, Fuel Return (16714-MBG-000) and when the assembly is removed you should replace the gasket (17574-MN5-000) which seals the fuel pump assembly. There are also some crush washers on the banjo fitting that could be replaced if you are ordering parts anyhow. I don't have the part number handy.
There is already an article on fuel filter replacement so I will focus this on the fuel pump. It is pretty much the same process so I would recommend looking at both articles. Since the tools needed and the process for the removal of the assembly is documented there I will skip that part of the job. It is pretty straight forward.
Ok I will start by saying that the towel is clean. Just stained. You do want a clean surface to work on.
Here is the assembly removed.

At the bottom of the assembly is a rubber boot that holds the Fuel Return Line Filter. This material is a stainless steel wool looking material. I have seen stuff for cleaning dishes that looks very much like this. I probably didn't need to replace it but it was cheap and I was ordering stuff anyhow.

Here is a comparison of the old and the new. The pic didn't turn our that well.

Once removed you can see the sock on the intake of the fuel pump.

To remove the pump there is a single screw that holds a band around the pump. There is also a ground wire attached to this screw. Remove it and then straps will bend back. Also disconnect the power lead from the pump.

Since I was replacing the filter and the pump I found it easier to remove them together and disconnect them separate from the assembly.

Swapping the part was as simple as disconnecting hoses and reconnecting them. The sock is held in place by a friction washer. I popped off the old one and used the new one that came with the packaging. There wasn't an easy way to get a shot of that but it is pretty simple. As long as you have the pump and possibly the filter out of the way, now would be a good time to replace the gasket. You can do it at the end but it is easier to do it now at this point with the pump and possibly the filter out of the way.
When reassembling make sure the return filter is where the return line dumps fuel back into the tank. Basically between that and the sock that has to get reused as seen here.

Button the rubber boot back up and you are done reassembling the pump assembly.
Here are some shots showing the old pump and the new pump side by side.
New pump on top

New pump on the Right. This shot is the intake of the pumps. The post in the middle are there for the friction washer to retain the pre-filter sock.

New pump on the Right. This shot shows the output and the connector for the power.

When I opened up the rubber boot on my pump this is the debris that was located on the pre-filter sock.

Since it may come up, there isn't a real reason I am replacing the pump. I am having some issues with stalling where I wanted to replace the filter. At $68 I figured I might as well throw a new pump in as I have close to 100K miles on this pump. My stalling issue is more likely related to the fuel filter, fuel pressure regulator or vac leak which I will address if the filter doesn't resolve my stalling issue. The new pump comes with a new pre-filter sock but it will not fit in our application. Blowing on the old filter and comparing it to the new one showed that it was pretty restricted. The entire process was a little over an hour.
Hope this option helps someone out there if there is a fuel pump issue.
You have listed a sealing washer here, what is this part, is it the copper crush washer/s at the tank feed outlet?Not really having any issues with this at the moment but I'm considering doing this as precautionary since I've had some work done this year and I'm in the high 90k mileage. Just looking to get some blessings on the parts and their numbers. Looking to do in 2-3 weeks as I'll be heading out to NNESToc on Monday.
Fuel Pump
Gasket
Filter
Sealing Washer
If the fuel gauge is below two bars there is no gas left in the upper tank, so you can safely open up the lower tank.My question is: When you took the top off the bottom tank is gasoline flow out everywhere?
If so, how did you handle it.
Thanks