Re-baking my ST1300 (Almost full redoing)

@leondante I have recently purchased a 2004 Goldwing with Champion Trike conversion. I am selective of what I do to this new toy! The price was a Great find especially with only 65000 actual miles (104,607 kilometers) and the bike looks great! The previous owners did a poor job of overall maintenance, much polishing but little else! I will make the bike safe to ride, then slowly and selectively improve it. I have full realization that this bike may not be worth to me all that it is going cost ..........BUT it also may prove that I took the correct chance!

Sounds sweet. Hope you get a happy ending with the Goldwing, it's a nice road monster.

In my situation the thing is that I don't care how much time I'm spending in the ST1300, because it's a great bike and it's worthy. Anyways I'm not taking more than a year and I'm not dying because not having it, so I'm going with it and the worst tasks are already done. Also along the path I'm learning new things and remembering important old ones, and the work it's getting pretty profitable. Most of the parts are in very good conditions, the ones that are not that well can be bought. At the moment I'm giving it 4.7 stars out of 5 to this job's outcome.

In the worst case scenario I'm spending in total HALF the cost of a second-hand one in mediocre/bad shape. But I'm getting one almost as new. ABSOLUTELY worthy. This is not a "maybe can be good" bargain. This is a dead corpse of a roadkill I'm resucitating to life again, and it's cost-worthy in my case because I know how to get the situation there.

By the moment:

- The bike: 500€
- Taxes: 150€
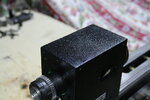
- The alternator: 800€
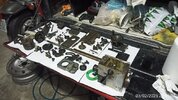
- Some Honda parts: 170€
- Some not Honda parts: 40€

- TOTAL: 1660€
- TOTAL if an engine change is needed: 2360€

- A second-hand in bad shape option in Spain: 2600€

Things have to be really bad to get a really expensive issue with the admision, the refrigeration system, the fuel pump, etc. The motorcycle, supposedly, stopped working because the alternator got broken and stopped having electric energy. And at this point the things I have on my hands already working and tested are already worthy to take them to work. I won time ago already.
 
I still have my ST 1300, it is a daily rider. so my trike is like your ST not a do or die situation just a steady project that is sometimes Expensive.

purchased
rear shocks $1200.00 (ouch!)
front tire mounted $280.00
fluids clutch, brakes, antifreeze, engine & differential oils $50.00

need to purchase
front fork cartridge kit @$500.00
universal joints for driveshaft @$70.00

possibly need to purchase
anti roll bar @$500.00
ECM @$1400.00
Estimated total so far $4000.00

On a fixed income It will take me a little longer to complete, or decide to sell.
 
These days I got tired of looking for the sleeves for the brake fixing so I went to a lathe dude to buy them. Vewy eggspensiwe. So I got full tired mode, got the "frog it, I'm buying my own lathe and doing it myself" attitude and bought a "lathe macciato", as it's freaking dirty, full of dust, rust and kind of lust. So, again, thing will be stopped until finishing the lathe fixing. It's not that bad, so I hope finishing the lathe before end of the month and still get the bike for this spring season in spite of the delay. And I'm getting a nice, sweet lathe, so nice trade. It's already dissasembled. It has some play in some places, but not that bad.


1738792885930.png
 
Last edited:
These days I got tired of looking for the sleeves for the brake fixing so I went to a lathe dude to buy them. Vewy eggspensiwe. So I got full tired mode, got the "frog it, I'm buying my own lathe and doing it myself" attitude and bought a "lathe macciato", as it's freaking dirty, full of dust, rust and kind of lust. So, again, thing will be stopped until finishing the lathe fixing. It's not that bad, so I hope finishing the lathe before end of the month and still get the bike for this spring season in spite of the delay. And I'm getting a nice, sweet lathe, so nice trade. It's already dissasembled. It has some play in some places, but not that bad.

1738792885930.png
Dang! That poor thing is totally FUBAR... how can one neglect a precision tool like that... :(

Looks pretty much like my Erba Compact 300 lathe... quite versatile, has served me very well in numberless occasions...
Hope you also received the manual and the bag with all the additional gears, as well as the spare belt to it... it requires 8x8mm chisel/tool holders BTW...
 
Greetings, very interesting, I'm also considering buying one, I might get into it, of course when I can save up for it.
Cheer up.
Vsssssssssssssssssssssssss...
 
Dang! That poor thing is totally FUBAR... how can one neglect a precision tool like that... :(

Looks pretty much like my Erba Compact 300 lathe... quite versatile, has served me very well in numberless occasions...
Hope you also received the manual and the bag with all the additional gears, as well as the spare belt to it... it requires 8x8mm chisel/tool holders BTW...

I love your optimism. Sadly for the price I cannot ask for too much. The gears I already found them in AliExpress for around 25 euros and also the belt. Don't worry, the thing is exactly the same in this case, the lathe is clearly a cheap chinese copy of that Erba. Hope I can get it to work close to "properly". Things seems good under the dirtiness. A few things to calibrate and fix and maybe will get good to go. I'm saving around 300 or 400 euros after all the work invested in the tool.

I'm sharing some pictures.

EDIT: Forgot to tell that it's my first time trying to get that dotted pattern with the paint. I got it using a small Sagola paint gun, using very low pressure and opening the needle gradually until getting those spits from it. It looks great. First I cleaned the thing thoroughly, even fixed some hits the thing had all over the rail for the tool to displace along it, then used canned primer and then a first layer of black paint for rust protection, then another one of the same paint but using that procedure to get that look.
 

Attachments

  • IMG_8776.JPG
    IMG_8776.JPG
    88.1 KB · Views: 22
  • IMG_8785.JPG
    IMG_8785.JPG
    83.9 KB · Views: 21
  • IMG_8787.JPG
    IMG_8787.JPG
    81.1 KB · Views: 21
  • IMG_8789.JPG
    IMG_8789.JPG
    116.7 KB · Views: 20
  • IMG_8791.JPG
    IMG_8791.JPG
    104.7 KB · Views: 20
  • IMG_8792.JPG
    IMG_8792.JPG
    94 KB · Views: 23
  • photo_2025-02-05_11-02-33.jpg
    photo_2025-02-05_11-02-33.jpg
    129.1 KB · Views: 22
  • photo_2025-02-05_11-02-33 (2).jpg
    photo_2025-02-05_11-02-33 (2).jpg
    102.2 KB · Views: 23
Last edited:
Well, things are going nice these days.

First, I managed to get the small pressure meter to the front brake pump, and I just tested the pump itself. The thing works great, good pressure and tight holding sensation. I'm really happy that I managed to get all the air bubbles from inside the meter thingy. Later on I'm putting that dial so I can get readings from the driver's place. As expected, the common braking uses less than 100 bar, and the very hard braking thing could reach 200 bar, but close to not useful strenght in real situations. Using full muscle hand power just a few times peaked 250 bar. Even that it's possible, never could be useful for real braking situations.

That means the 250 bar limit of the hose I bought is perfect, also that the 400 bar burst pressure is long way a good margin for errors. Also, I'm gonna be able to test that data properly with this measuring tool now I have installed on my bike. I insist, it's put that way just for testing purposes, it's going in the proper way after installing the brake hoses, which now it have not installed (see video attatched in .zip file). The "lathe macciato" is getting good fast, sure next month I'm using it and fixing the brake hoses stuff.

Remember the "putting the brake fluid with pressure and speed so you can drag the bubbles out of the circuit easily" idea? Well, get a load of the greatest thing I could get to put the brake fluid inside the lines with some pressure and speed from the correct side of the circuit. I'm a bit proud of the idea and about finding the proper parts for creating the tool. All AliExpress parts. See pictures attatched. I think it's magnificent. This will save me lots of hours, I'm extremely sure.
 

Attachments

  • 20250219- manómetro presión freno st1300.mp4.zip
    2.8 MB · Views: 4
  • IMG_8828.JPG
    IMG_8828.JPG
    136.4 KB · Views: 16
  • IMG_8829.JPG
    IMG_8829.JPG
    72.1 KB · Views: 13
  • IMG_8831.JPG
    IMG_8831.JPG
    183.8 KB · Views: 16
  • IMG_8833.JPG
    IMG_8833.JPG
    141.4 KB · Views: 16
Back
Top Bottom