You are using an out of date browser. It may not display this or other websites correctly.
You should upgrade or use an alternative browser.
You should upgrade or use an alternative browser.
AZ 2005 build - Are you ready for another one?
- Thread starter SupraSabre
- Start date
Is that a Craftsman ratchet down by the brush? Looks like the ones I have,
Is that a Craftsman ratchet down by the brush? Looks like the ones I have,
It is! I've had that one for MANY years!
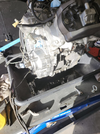
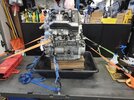
My first task of the morning was to build a "engine stand". I then pulled out the tractor and lifted the engine up, cleaned the oil pan and then placed the engine on the stand. So now it sits high enough for me to work on the front and the back. I still need to get the part numbers together so I can figure out what I need for this.
Attachments
Looks like she's strapped down for the dyno test.
Looks like she's strapped down for the dyno test.
I don't need it falling over on me!

ST Gui
240Robert
It is! I've had that one for MANY years!
Likewise.
I went through my "Parts Bins", and found a bunch of stuff that should keep the $$$$ down for the ordering of the parts I don't have. I found a used clutch, that seems to be in good shape. Right there, that's $$$$ saved.
I also had to order some more Gates Thermoplastic clamps for the coolant hoses. My son Justin did his (my first ST1300) 2005 with those, (which is when he told me about them) and he has not had any leaks now over 13 years! I replaced my 2004 when I did it's last overhaul, and I did, nor do I now have any leaks detected so far. Needless to say, I'll be using them on this build.
I'm hoping to start on pulling the front cover today. Being an old cop bike, I'm hoping for no surprises!

RiderRon
Site Supporter
I’m late to the party.. Probably be a good idea to check/change the brush holder in the alternator while you have the engine out and all cleaned up. Here I am not wanting to replace my knock sensor harness and here you are doing another rebuild… I am terrible.. lol
I’m late to the party.. Probably be a good idea to check/change the brush holder in the alternator while you have the engine out and all cleaned up. Here I am not wanting to replace my knock sensor harness and here you are doing another rebuild… I am terrible.. lol
I'm actually putting a different alternator in it. this one I picked up off eBay and looking at it, there's very little dirt on it. I'm also using a different starter, another one of my eBay treasures. After digging in my parts bins, I came across three alternators and five starters. And I'll be adding at least one of each, after I'm done with this build! LOL
Your project answered one of my questions, wondered if one could put a 1300 engine in a 1100 bike, would not be easy. Two many things different. Was easy on my 81 Silverwing swapping to a 650 .
Your project answered one of my questions, wondered if one could put a 1300 engine in a 1100 bike, would not be easy. Two many things different. Was easy on my 81 Silverwing swapping to a 650 .
That was because the 500cc & 650 engine were basically the same engines, just different CCs. Were as the ST1100 and ST1300 are completely different engines.
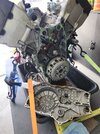
After cleaning up the gasket leftovers, I took the front cover out to my press (it lives in my big shed) and removed the propeller, bearing and the seal.
The area where the seal sits is pretty gunked up. I'll have to clean it out, somehow.

It had been awhile since I did a waterpump, so I tried to push out the seal with the bearing. It doesn't like to play that way. I had to remove the bearing, then I could push out the seal, since they come out the opposite directions. But you can see where the seal sat is pretty ugly.
Also please note, especially for those of you that plan on replacing your waterpump at some point, Note the rings around the shaft of the waterpump shaft? Those are caused by the seal, and there are groves in that shaft, that should not be there... That's why you need to replace the waterpump blades/shaft when you replace the seals.
When I install the new waterpump, I'll try to remember to take pictures as I'm pressing the parts together.
I reinstalled the front cover, while I wait for the parts to come in, to help keep the dirt out.
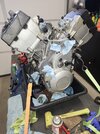
The area where the seal sits is pretty gunked up. I'll have to clean it out, somehow.

It had been awhile since I did a waterpump, so I tried to push out the seal with the bearing. It doesn't like to play that way. I had to remove the bearing, then I could push out the seal, since they come out the opposite directions. But you can see where the seal sat is pretty ugly.
Also please note, especially for those of you that plan on replacing your waterpump at some point, Note the rings around the shaft of the waterpump shaft? Those are caused by the seal, and there are groves in that shaft, that should not be there... That's why you need to replace the waterpump blades/shaft when you replace the seals.
When I install the new waterpump, I'll try to remember to take pictures as I'm pressing the parts together.
I reinstalled the front cover, while I wait for the parts to come in, to help keep the dirt out.

Last edited:
Sidekick
Save Ukraine Stop War!
Thank you so much for meticulously documenting and sharing each step—this is truly invaluable! On a related note, would you be able to provide a list of all the Gates Thermoplastic clamp sizes needed for a complete factory replacement?
I’ve already swapped mine with Aero-Seal Constant Torque Liner Clamps, but the results have been mixed—they still leak when parked during the winter. Ha!
I’ve already swapped mine with Aero-Seal Constant Torque Liner Clamps, but the results have been mixed—they still leak when parked during the winter. Ha!
I moved the 06 engine to a dolly. so I could get it off my lift and I put the 05 on the lift.

And yes, I rode the 05 up on to the lift. It still runs, but it has a nasty sound to it.
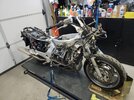
Because the 05 is pretty dirty, I think I'll take the hose to it on Wednesday, since I plan on doing a ride tomorrow (Tuesday 2-25).

And yes, I rode the 05 up on to the lift. It still runs, but it has a nasty sound to it.

Because the 05 is pretty dirty, I think I'll take the hose to it on Wednesday, since I plan on doing a ride tomorrow (Tuesday 2-25).
...would you be able to provide a list of all the Gates Thermoplastic clamp sizes needed for a complete factory replacement?
...
These are the Gates Theromplastic clamps that I use:
#32929 : 1 1/16" to 1 3/16"
#32934 : 1 3/16" to 1 1/2"
#32922 : 13/16" to 15/16"
#32919 : 11/16" to 13/16"
The Gates smaller hose clamps didn't work, so I used mini Fuel Injection clamps.
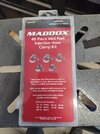
Sidekick
Save Ukraine Stop War!
Wonderful, thank you so much, you are saving me a lot of frustration and time searching online.

For those that have used the Gates Theromplastic clamps, I'm guessing they likely should not be used for hoses that may need to be removed in the future. Such as radiator hoses for potential radiator removal.
I've read that a soldering iron is a good way to remove if necessary.
I've read that a soldering iron is a good way to remove if necessary.
Share:

