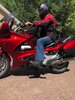
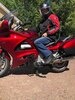
The peg position works pretty well for me. Plenty of airflow through the ballroom  with my knees out in the breeze, and it kicks my legs forward a bit so that they are not tucked under me. In any real traffic and probably 90% of the time even on the highway, I'll have my feet on the main pegs -- I only really feel tension across my knees after two tanks in a row, and I rarely ride more than three tanks in a day.
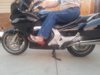
Pix attached are the ONLY time you'll see me wearing flip-flops on a bike... my black moto boots don't contrast well with the black bike. I'm more ATTGAT, FWIW.
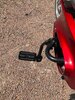
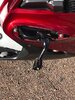
I wrapped a red bandanna around the peg for visibility.
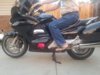
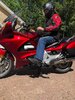
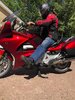
1. Normal freeway riding position... weight on the balls of my feet
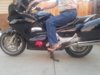
2. Normal around-town position soles on the pegs and toes near the shifter or pedal
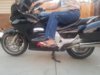
3. Toes on highway pegs
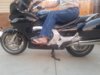
4. Instep on highway pegs
5. Heels on highway pegs
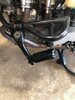
Any time I'm in traffic, I like my fingers and toes on their respective levers. Stretching out on the pegs is an exercise for a few minutes at a time for my knees (position already improved by adding the peg extensions) or to change my position in the saddle.
FWIW, I'm 6', 210lbs, and I wear 36" inseam Jeans -- and that's a reskinned factory seat set at the tallest level.
with my knees out in the breeze, and it kicks my legs forward a bit so that they are not tucked under me. In any real traffic and probably 90% of the time even on the highway, I'll have my feet on the main pegs -- I only really feel tension across my knees after two tanks in a row, and I rarely ride more than three tanks in a day.Pix attached are the ONLY time you'll see me wearing flip-flops on a bike... my black moto boots don't contrast well with the black bike. I'm more ATTGAT, FWIW.
I wrapped a red bandanna around the peg for visibility.
1. Normal freeway riding position... weight on the balls of my feet
2. Normal around-town position soles on the pegs and toes near the shifter or pedal
3. Toes on highway pegs
4. Instep on highway pegs
5. Heels on highway pegs
Any time I'm in traffic, I like my fingers and toes on their respective levers. Stretching out on the pegs is an exercise for a few minutes at a time for my knees (position already improved by adding the peg extensions) or to change my position in the saddle.
FWIW, I'm 6', 210lbs, and I wear 36" inseam Jeans -- and that's a reskinned factory seat set at the tallest level.