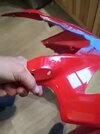
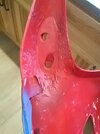
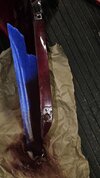
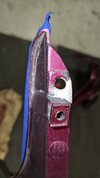
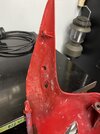
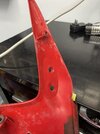
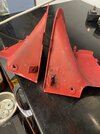
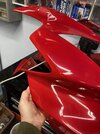
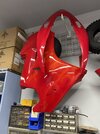
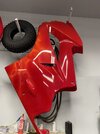
Cracked side fairing repair.

That's good to know! Thanks! That also explains how I would apply it over the crack since I had questions about that. I will definitely try that method on some other cracks in the future.

I read that I'd only need a little baking soda to make the super glue gel method work. Does it matter or can I just apply it liberally and dust the residual off after it sets up?
I just pour the baking soda over it liberally (with a catch rag underneath it) and let it all set for 5 or 10 minutes.
Just be warned - the concoction gets really, really hot so don't touch it unless you want to get burned. ;)
 
I looked at the baking soda and super glue videos. The difference between Q Bond and the super glue method does not exist.
Even saw metal added to it. Q-Bond is expensive and super glue method is now being replacing it.
Really like the way stripped screw holes can be repaired by toilet paper and glue.
The uses are endless
Toilet paper and glue? I have to see that. Can you link the video?
 
Found the video by putting in super glue and baking soda, Trying to figure out pictures to forum. Links for me are way out there. I could fade into the Matrix. Do they have STs in there?
 
I have just repaired a broken fairing for a friend, I have in the past used the screen and a heavy filler glue method, have not done the baking soda method. all of these work great on cracks I am sure. It seems like anybody who rides a long time sooner or later has a cracked fairing and finds ways to fix it that work great'
I have just picked up some filler that is sandable and is laced with fiberglass. I grooved the outside a bit and filled and sanded the outside and put a layer on the inside that met the outside, the tabs are the worst part. Used super glue, Q bond i have to look up the baking soda method and the heat with filler.
This is an VFR 800 that had a nasty garage spill - Keith’s efforts are excellent in saving the front cowling
 

Attachments

  • 0824240937b.jpeg
    0824240937b.jpeg
    33.9 KB · Views: 26
  • 0824240937a.jpeg
    0824240937a.jpeg
    42.2 KB · Views: 25
Just a sidebar- for the side panels (with the plastic ‘pins’ that insert into the rubber grommets), I got in the habit of using silicone spray on the grommets and the pins to make them slide in very easily as well as come apart easy next time, otherwise, they can be a struggle to get them to slide in.
 
Just a sidebar- for the side panels (with the plastic ‘pins’ that insert into the rubber grommets), I got in the habit of using silicone spray on the grommets and the pins to make them slide in very easily as well as come apart easy next time, otherwise, they can be a struggle to get them to slide in.
Really good advice, swearing doesn't work as well as silicone
 
Found the video by putting in super glue and baking soda, Trying to figure out pictures to forum. Links for me are way out there. I could fade into the Matrix. Do they have STs in there?
OK, I'll do that search.

BTW...Copy and paste are your friends. If on a Windows system, you highlight what you want to copy and press the Crtl key and then the C key together. Then you go to where you want to paste what you just copied, click on that area, and then press the Crtl key and then the V key together. Those are shortcuts to the pulldown menu options.

For photos....first figure out where on your computer the photos are that you want to upload to the forum. Then click on the Attach files button in the lower left corner of the message "box" your posting in - like this one. Navigate to where the photo is and double click it or just highlight it (select it) and choose the Open button. Once it's been uploaded, choose the "insert" option and "fullsize" or whatever you want.

Clear as mud?
 
Just a sidebar- for the side panels (with the plastic ‘pins’ that insert into the rubber grommets), I got in the habit of using silicone spray on the grommets and the pins to make them slide in very easily as well as come apart easy next time, otherwise, they can be a struggle to get them to slide in.
Good tip. I'll do it.
 
I just repaired a hole in the upper fairing where the windshield fastens to using super glue and baking soda. The piece was completely gone, so needed to build it up from nothing. It does take some patience and practice.

For mine, I used some aluminum aircraft tape to make a smooth surface and rolled another piece of tape to wedge in for the hole. Then built it up layer by layer so to speak. I started with pouring baking soda in first then the glue, but the glue wouldn't always soak through. Glue first, then sprinkling soda works better and more consistent. Once I was done, I just used a file and some sandpaper to smooth it out. It was behind the windshield, and though it is visible it's not eye-catching,

For your repair, the only thing I would have suggested is to cut a V notch into the crack so the glue could penetrate more and bond with both halves. But it looks thick enough to hopefully hold for you. As others noted, that panel is one commonly removed, so it'll have to flex and give. Let's hope you don't have to do it again,
 

Attachments

  • 20241111_090857.jpg
    20241111_090857.jpg
    90.4 KB · Views: 13
  • 20241111_090905.jpg
    20241111_090905.jpg
    73.3 KB · Views: 12
The ST that I bought has a badly cracked left side fairing. I've prepped the crack areas on the backside of the fairing and cleaned them with acetone.

I'm planning to repair it with Plast-Aid, but wondered if anyone has a better method.456E30DF-2CBD-48A4-8AA5-5C9734E54E46.jpeg
I put a "doubler" of relatively thin ABS behind and use ABS intended glue. Works well as far as strength.
 
I repaired a fairing for a VFR with a sand able body filler with fiberglass in it. The piece was a small thin piece that can now support the entire panel. John K, if you are reading this, I am so poor at posting pictures. I turned out really well and I was pleased with the results
 
I just repaired a hole in the upper fairing where the windshield fastens to using super glue and baking soda. The piece was completely gone, so needed to build it up from nothing. It does take some patience and practice.

For mine, I used some aluminum aircraft tape to make a smooth surface and rolled another piece of tape to wedge in for the hole. Then built it up layer by layer so to speak. I started with pouring baking soda in first then the glue, but the glue wouldn't always soak through. Glue first, then sprinkling soda works better and more consistent. Once I was done, I just used a file and some sandpaper to smooth it out. It was behind the windshield, and though it is visible it's not eye-catching,

For your repair, the only thing I would have suggested is to cut a V notch into the crack so the glue could penetrate more and bond with both halves. But it looks thick enough to hopefully hold for you. As others noted, that panel is one commonly removed, so it'll have to flex and give. Let's hope you don't have to do it again,
I tried to cut a "V" notch in as much of the cracks as I could to give the crack more surface area. As careful as I tried to be to get each side of the crack lined up - I used tape on the paint side of panel to stabilize the area - the two sides did not line up exactly flush. That gave the crack more surface area for the Plast-Aid to grip but I really wanted the painted side to look perfect. The repair doesn't look bad and the cracks were so long that I'm just happy that it's holding like mad and looks in no hurry to crack again. The Plast-Aid worked very well as it has for me in the past and remains firm but flexible.
I put a "doubler" of relatively thin ABS behind and use ABS intended glue. Works well as far as strength.
That would have been ideal. I wish I'd had some of that thin ABS.
 
Back
Top Bottom