Yesterday after reading this thread beginning to end I ordered the Evitek H-4 6500k lamps with shield from Amazon, which had available free same day delivery(Amazon Prime).
I installed them last night.
I also used a pair of Honda to H-4 adapter plates, bent the two lower tabs back on the lamps and the install was seamless.
I am shocked how bright they are and will dial down the headlight adjustment to not dazzle oncoming traffic.
The color temperature matches perfectly my Cree element driving lights.
All in all very nice performance lighting upgrade to my venerable ST1100.
Mine arrived today. ST1100
update..
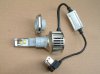
I have an entire headlight assembly sitting here on the table in front of me and still can't figure out how these things install. I can do conventional bulbs, on the bike, in my sleep.
The ring mount with the 3 tabs is held on the LED light assembly with two small screws. I've read about removing it, although that seems to make no sense, and screws were not mentioned. I've removed the two lower tabs from it and will be using the H4 adapters.
No clue how to handle the spring clip with respect to fitting around the LED assembly to lock it in place, or what to do with the rubber boot either!
Again...ST1100
Last edited: