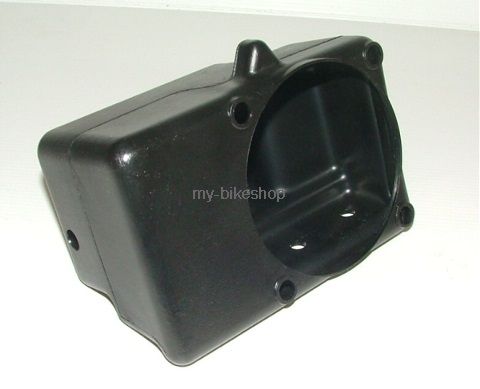
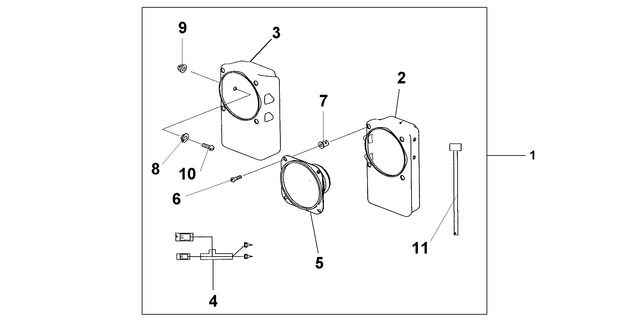
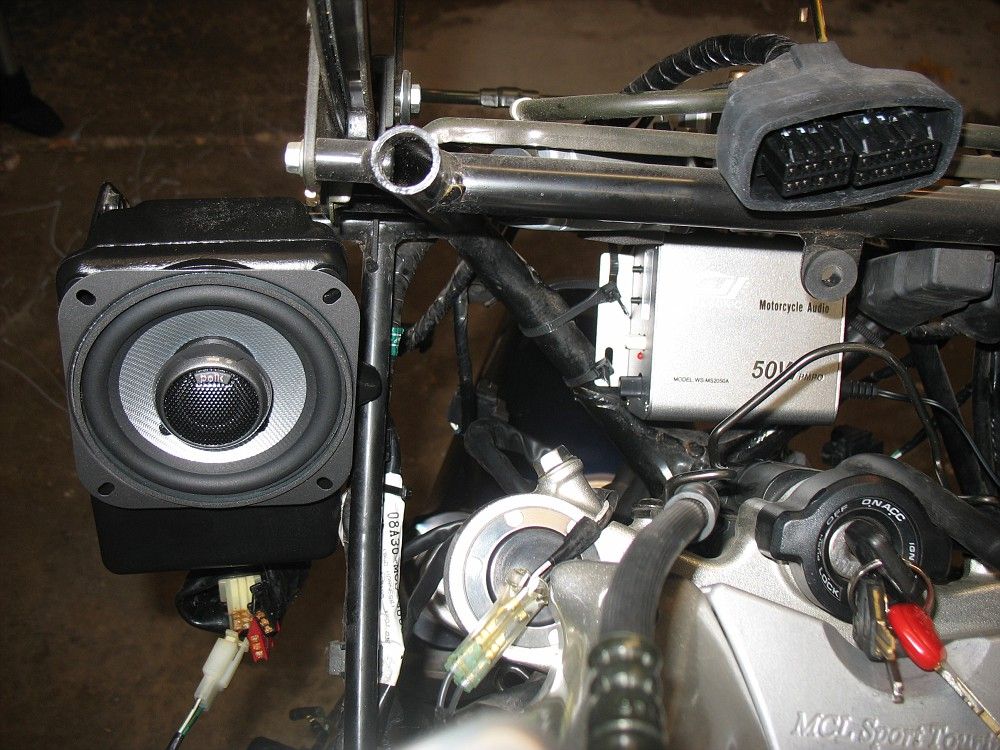
No dimensions but the installation instructions for the OEM kit:
Apparently the enclosures get mounted onto plates welded to the sub-frame beams holding the rear-views.
According to the manual are rubber well-nuts (ans known from windscreen installation) used to hold the enclosures to the frame as well as for fixing the speaker chassis in them; due this they have no direct connection/mounting towards the dash/speaker grille (makes sense, as it ingeniously prevents audible vibrations/resonance during playback), seems you'll need 12 in total, plus the M5 bolts for them.
So once you've snatched boxes of usable size, you will first need to hold them into place with the dash-panel in place(!) to determine a) the location of the two bores holding them on the plate of the sub frame and b) align the larger bore for the speakers with the openings/speaker grilles of the dash-panel; all with clearance so nothing starts to vibrate due the "oomp" of the speakers ;-)
From what I can make out the speakers are of 100mm/4" basket size; OEM were wideband speakers, you might opt for 2-way coax though (but don't expect much bass from a 4" cone though...) which bears the risk of dust collecting in the gap for the coil... (if you're fancy you might opt for a 2-way set with aux tweeters, which ensures a closed mid-bass cone, but challenges with the then required placement of the tweeter...)
I'd estimate that the dimensions of the casings (orientation when installed in the bike) for being about: 150x100x50mm / 6"x4"x2" (H/W/D)
My work-flow on this would be:
- get appropriate, well made, open (no moulded-on grille!) marine type 2-way coax speakers, preferable in black so nothing peeks through the speaker grilles (always good to have the real thing in hand for the fitments)
- make cardboard boxes with those 6x4x2" as a template, at least two for left and right; might need more to compensate initial D&D errors ;-)
- undress your ST1300, but put the dash panel back in place
- start holding your cardboard boxes into the designated installation places to get your live measurements and clearances required, modify your cardboard dummies accordingly
- cut the 4" openings, insert the speakers and check the installation spaces again
- once you've established your final design, hop into car, rush to RadioShack/alike to obtain the desired plastic housings, also in black if avail (or give them a shot with a rattle-can prior final installation)
- start drilling and cutting, use fancy language, trash unsuccessful builds, rush back to RadioShack for replacements, etc... ;-)
Once everything is detailed and fitting properly, I'd seal the speaker chassis towards the rim of the casing bores; weather resistant foam-strips or sealant (nothing permanent like epoxy as some dayou might need to replace them speakers...)
I'd include a rubber grommet for the wiring exit and also place a bore (15~20mm/0.6~0.6") into the bottom of the enclosures, to provide a) a drain opening and b) a "vent" for the (air)movement of the speaker cone as their normally designed for much larger volumes.
Finally: cover the whole she-bang with lots of photos and post a report on ze forum ;-)


