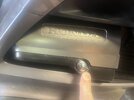
Removed screw from engine cover, can’t put it back in

Joined
Jun 27, 2024
Messages
2
Age
59
Location
Portland OR
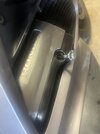
When doing an oil change on my 2003 ST1300, I removed a screw for a cover on the top of the engine (above the oil filling cap) and put it back but it keeps popping back out, not sure how to put it back in, it feels like is in ( the thread doesn’t look or feel stripped) but when I start the engine it has a knocking sound and the screw rattles. Do I have to take the whole thing apart to put the screw back ?IMG_3482.jpegIMG_3481.jpeg
 
That's a valve cover screw and does not need to be taken out unless you're doing a valve check... it's tricky but should screw back in unless you broke it.. take it out and see if it's broke.. only something like 10 ft lbs of torque if I remember correctly.
 
DO NOT run the engine, until you remove the cover and check why the screw will not go back in and stay there ... ...
Does the end of the screw look to be broken ??
If not and you heard a knock / rattle, have you broken off part of the casing ??
Open it up and see what is there (and what should not be there) ... ...
Here's hoping nothing got into the valve train and caused more damage.
 
When doing an oil change on my 2003 ST1300, I removed a screw for a cover on the top of the engine (above the oil filling cap) and put it back but it keeps popping back out, not sure how to put it back in, it feels like is in ( the thread doesn’t look or feel stripped) but when I start the engine it has a knocking sound and the screw rattles. Do I have to take the whole thing apart to put the screw back ?IMG_3482.jpegIMG_3481.jpeg
Broken screw I guess, It's happened to one of my friend recently.
They are made of glass and only accept a very specific torque limit (10ft) and not more.
This is a very sensitive area, and you will eventually need to use a screw extractor and to proceed very carefully and only if you feel comfortable doing that sort of things.
You will need to remove the valve cover and the broken thread should come out pretty easily.
Be careful for any metal shaving or particles going into the head.
It would also be better to not run the engine as long you haven't fixed the issue.
My two cents and I wish you good luck!
 
Last edited:
Before installing bolt into bore blow some air into it to make sure the bore is empty. It is possible that it has oil in it that is not allowing the bolt to seat
 
Anything less (as stated above) of removing the valve cover, inspecting the casing and inside, then making sure it’s not sheared off is asking for trouble and serious damage/repairs that I don’t wish on anyone. Hoping it’s a learning moment with little issue. Please make the effort to inspect the inside first, if all looks good try to thread it in with the cover off. Let us know and take pics share.
 
Pull it out and look at it. If the threaded end is sheared off that’s not good but it’s likely just fine. That bolt passes through about 3” of thin air before entering the threads in the cylinder head. IT IS EASY to get it slightly crooked and not in the threads at all but it feels like it is in place because it threads up against the boss that is threaded but it won’t hold. From your description I think you didn’t get it threaded in the hole - most guys can tell when they break a bolt off.

Secondarily, the round doughnut looking thing that the bolt passes through is a seal and it needs to be replaced after years and miles because it compresses down and when the bolt tightens up the threads go metal to metal before you get the sensation of it snugging up. That’s why people snap them off.
 
I can never get that screw in the hole first time. (Or 2nd or 3rd come to that). The end nearly always wanders off to the side of the casting. It feels as though it is in place, but it isn't. When it is in position and ready to be screwed, the large flange well be only slightly proud - but more importantly it will look square. And when you turn it just half a turn, it will have caught on the thread and will not lift out.

I try to get the short one in first - because when I can't get it to go in, I have the longer bolt to practice with - holding the bolt square as you put it through the cover ! Once I have practiced, it is easier to get it right with the shorter bolt.

You did notice that the rear bolt is shorter than the others ?

Another trick is to wedge (bluetack ?) the bolt into a socket so that you get a better feel for the bolt alignment as it slides into the hole and down to the thread.
 
Last edited:
When doing an oil change on my 2003 ST1300, I removed a screw for a cover on the top of the engine (above the oil filling cap) and put it back but it keeps popping back out, not sure how to put it back in
You removed it and must have seen it was OK then. IF you got it threaded in and snapped it you'd probably know. But yea pull it out and make sure that the tip didn't somehow get broken off.
I can never get that screw in the hole first time. (Or 2nd or 3rd come to that). The end nearly always wanders off to the side of the casting. It feels as though it is in place, but it isn't.
And if the end isn't broken off this would be the first thing I check. I use The Force to visualize the threaded hole. From there it's a piece of cake. Any of the other possibilities might be the problem but this is where I'd start.
 
When you do get it started, thread easy. When the ring on the bolt hits the threaded boss, the torque value rises quickly. I would use the long end of an allen wrench between my thumb and finger.
 
send a picture of the complete bolt taken out of the cover. Are there threads on it ?Th
When you do get it started, thread easy. When the ring on the bolt hits the threaded boss, the torque value rises quickly. I would use the long end of an allen wrench between my thumb and finger.
You removed it and must have seen it was OK then. IF you got it threaded in and snapped it you'd probably know. But yea pull it out and make sure that the tip didn't somehow get broken off.

And if the end isn't broken off this would be the first thing I check. I use The Force to visualize the threaded hole. From there it's a piece of cake. Any of the other possibilities might be the problem but this is where I'd start.
Remove the bolt…..it should look similar to this. If the threaded end is gone, the valve cover has to come off to retrieve the broken part.
IMG_2815.jpeg
It does look whole did not break, it seems to go in all the way but it became loose when I started the engine and started also to make a knocking noise. I stopped it and wondering what of do next.
 
hard to say for sure, but it looks like your photo in post #1 may show that the rubber "grommet" is missing from the hole in the valve cover. If so, that explains why the bolt won't tighten down securely, it needs the grommet as a spacer to apply clamping force to the valve cover. 1100 owner, so I'm not sure what the 1300 should look like, but that bolt hole looks like it could be missing its grommet. The bolt will eventually bottom out on the shoulder shown in the picture of the bolt in question, not on the head of the bolt, so if the grommet is missing the bolt will just be sitting above the valve cover and not have any compression force on anything.

remove the bolt on the other side valve cover and see if it looks the same as the one in the photo, or different.
 
@dwalby, if you enlarge the picture, the oil seat washer is in place.
The OP more than likely has been not aligning the bolt correctly, and probably felt it wedged between the threaded insert, and the case (common mistake) easy to do.
I bet if he used just his fingers, paid attention to the angle of the fastener, and turned it counter clockwise a few turns first, that he would find the threads correctly.
in retrospect I guess without the grommet it would have been leaking oil out the hole and it would have been obvious.

So yeah, if the bolt isn't sheared off, and the grommet is in place, then your theory makes the most sense, he's probably not used to how it feels to align those bolts with their threads.
 
In this - "I don't know what to do situation" - I would eliminate the nasty thoughts about broken threads, sheared off bolts etc and remove the cover again. Keep the bolts separate so that you know which one goes where and which you are having trouble with.

3 bolts. 2 long ones, one short one. Compare the threads on all three bolts. And the lengths of the threads.

Check the threads screw into the holes. Practice holding at the end and look and see where the end of the bolt is going and find out what it feels like. Do it with your eyes closed and then open them to see where it is going. Repeat. Get the feel of it so you know what 'wrong' feels like and how to correct it.

Check the rubber seal around the head. Make sure that the right angles on both sides of the half moon rubber have old sealant removed and new sealant applied. Check that it is in place around the spark plug hole.

Check the washer seals are in place and are the correct way up. Put the cover back on. Check all round that nothing is trapped and that the cover is seated properly.

Try to get the bolts in again. Either Tape/blu-tack can both be used to make the fit of a hex socket a tight fit onto the hex head of the bolt which may give you a better feel.

Now you know that the threads are ok, and you know what getting it wrong feels like and what getting it right feels like, and nothing else is wrong - you stand more chance of success.

I'm not saying that this is good advice. I am saying that is what I would do - and what I did do the first time that I came across this issue.
 
Back
Top Bottom