You are using an out of date browser. It may not display this or other websites correctly.
You should upgrade or use an alternative browser.
You should upgrade or use an alternative browser.
Light bulb replacements?
- Thread starter GhenghisKen
- Start date
The lower fairings has to be removed. Replace both at tge same time. They take a weird voltage
They are a 12v light. You can however get at them without removing the lower fairings as I recall.
You do need to remove the windscreen, the filler plate underneath, gauges.
I put LED's in mine, but be aware not all LED's will fit if they are too wide to fit thru the hole.
Sorry, no videos.
You do need to remove the windscreen, the filler plate underneath, gauges.
I put LED's in mine, but be aware not all LED's will fit if they are too wide to fit thru the hole.
Sorry, no videos.
Last edited:
Found a video showing how to.... 
Awesome! thanks for the lead. I think I'll try going the LED route too.Found a video showing how to....
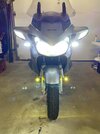
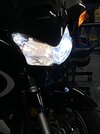
I put LED's in so they'd match the color temp of my LED headlight bulbs (I have the F2's), and the white/amber switchback LED's with the clear lenses in the turn signals.
I found having white LED headlight bulbs and yellow-ish incandescent "peanut" bulbs looked off.
Switching the turns to clear lenses and switchback LEDs isn't really required, unless you prefer the look.

I found having white LED headlight bulbs and yellow-ish incandescent "peanut" bulbs looked off.
Switching the turns to clear lenses and switchback LEDs isn't really required, unless you prefer the look.

Last edited:
Be careful removing those little light bulbs. At least a few of us have dropped the bulb inside the headlight. It is a pita to snag it and get it out. I suggest you measure the diameter of the hole, and poke a pencil straight in the hole until it touches the front inside of the headlight. Measure the length. Now, when you go online and look at LED lamps, you have the two critical dimensions to compare to your new offerings. Go for a new lamp that won't touch the front of the headlight.
A great source of LED replacements is Superbrite LEDS.com
They seem to stock an LED version of just about any automotive bulb. You just need the type number from the little side marker bulbs.
I have a small fleet of 1970s Yamaha XS650s and they are great bikes but very hard on instrument cluster bulbs (I think they are #192s) and about 3-4 years ago I replaced all of the instrument bulbs with SuperBrite equivalents - and none have blown since.
Last edited:
JohnK
Site Supporter
If you do lose a bulb into the headlight assembly, just use a metal coat hanger with a ball of masking tape on the end. I've had to use this method twice and it works great.
This is one of my dislikes with the ST design. Replacing bulbs is nearly as time consuming as rebuilding 1100 carbs. That aside, the bulbs on both our 1991 and 2006 are originals....for the ten years plus we've had them anyway..
Much different than my 1960's-70's experiences.
Much different than my 1960's-70's experiences.
ErnieB
erneST
I ran for like 6 months with one 'out' because it looked like such a PITA to get to.
When I finally did it, was about 15 minutes.
I didn't take the whole fairing off...
I took the piece from the front, up high right behind the bulb in question...maybe 3 screws and a plastic rivet?
Then I could reach it from the top side.
Mine were original....i think, been in there for 20 years. I didn't know if I needed to twist 1/4 turn or what and was afraid to just yank on it.
IT was stuck in there solid, but, I spun it a little and it pulled right out.
Take your time and don't get in a hurry.
Not as big a deal as I had dreaded.
Good luck.
Thanks - I'm always afraid of starting in on mechanical jobs and getting out of my depth fast. End up with a bike in pieces and not knowing what to do next.
It didn't happen on my 1300 but I did drop a similar bulb in the headlight shell of my kid's 650 VStrom. I hot-glued a tiny neodymium magnet to the end of a stiff piece of wire and fished it out. I think it was better than tape because the magnet attracted the ferrous metal in the bulb's contacts. Easy, peasey.If you do lose a bulb into the headlight assembly, just use a metal coat hanger with a ball of masking tape on the end. I've had to use this method twice and it works great.
<Pause for a brief product plug.>
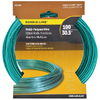
Let me sing the praises of this stuff. Great for all sorts of applications - bundling cables and wires, hanging things while spray painting, making impromptu hooks to hang gear, etc, etc...
Better than coat hanger wire. Easier to cut and bend, holds its shape better than coat hanger, and won't mar what it touches.
Great stuff

Share:


