Cleaned carbs - how to perform the idle drop procedure

Joined
Nov 11, 2024
Messages
25
Age
64
Location
The Netherlands
Bike
ST1100S
Now, finally I cleaned the carbs, replaced most (rubber) gaskets and I put the carbs back on the bike. Pilot jet screws were on 2,25 turns from fully closed (loosely tightened).
It starts so I'm quite happy. However it runs on 2,5 to 3 cylinders and I need to keep the throttle by hand otherwise it drops off.
I thought I need some more cleaning so I removed the carbs again and made sure the pilot holes are all clean and tested it by spraying carb cleaner into the pilot jet screw holes and watch carb cleaner comes out all holes. All 4 carbs are checked that way.
The pilot jets screws are all at 1,75 turns from fully closed (loosely tightened) now and (again) the bike won't start.
This leaves me to think that the pilot jet screws are not enough opened. So the idle drop procedure kicks in I'm afraid.
Therefore I have some questions to this knowledge base and hope to receive some answers. :cool:

1. How to perform the idle drop procedure with all carbs on the bike and have it run until it is warm?
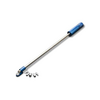
2. Do I need 4 of the special tools to turn the pilot jet screws? It's awful difficult to do the procedure with only one tool as there's no place on the bike to move the tool from one carb to another.

I'm starting to get the screws back to 2,25 turns from loosely tightened and then let the bike run for 5 minutes and check the (new) spark plugs for signs of lean or rich mixture and do the procedure over and over again until it satisfies me ;)

The problem I have with this approach that I need to remove the carbs all the time to change the pilot jet screws. Is there a better way to perform the idle drop procedure?

Thanks to all you knowledgeable people who want to help me with this endeavor!

Best regards and thanks,
Willem.
 
It is some years since I had my 1100, but I did work on the carbs A LOT because it had been stood for 10 years. I considered idle drop but as you point out, getting the tool to reach the screws is really difficult, so I left my rebuilt carbs at the standard screw position.

I think the difference in pilot screw opening between the rest of the world and the US is that the US uses leaner low speed jets so the pilot screw needs to be opened more to offset that.

If your bike runs on 2-3 cylinders unless you open the throttle, I would suggest you still have some partial blockage of either the low speed jets or the internal passageways in the carb. The low speed jets have awfully small bores and are difficult to properly clean.
 
Just as a comment based on what I have read;
Martin, from Martin's ST1100 website, states that most people set the pilot screws to between 2 and 2 1/2 turns out and never bother with the idle drop procedure.

Adam (@afrymoyer) seems to have a lot of ST1100 carburetor knowledge and experience. Maybe, if you are lucky, he will chime in.
 
need to sync them first, if they are out of sync it doesn't help playing with the mixture screws.
Yup... and since one interferes with the other quite a patience game... like when you tweak #2, #1 & #3 are off, and vice versa, etc, etc...
I normally need about 3, sometimes 4 runs till I find it running to my satisfaction...
Plus I place two large office fans in front of the bike providing cooling/airflow, cause otherwise the mixture "enriches" and the engine starts to run like crap...
Martin, from Martin's ST1100 website, states that most people set the pilot screws to between 2 and 2 1/2 turns out and never bother with the idle drop procedure.
Ditto, (2 1/4 on mine) and to even notice the +/-50rpm drop mentioned one would need a digital tachometer to begin with...
 
Allen's is better than the Honda OEM tool for sure. One could also make the same tool without any special equipment - it just would not look as nice.
 
Hey Willem...

If I remember correctly, you're the chap that removed the upper plenum first, before removing the carb bank? If this is the case, then the above posters are more than likely correct. You'll need to start with a carburetor synchronization. The carbs have been twisted around pretty good at removal, then again at re-assembly. There isn't one carb that's even remotely close to being sync'd. Remember it's normal for the ST to run like total crap after a complete carb service. You MUST synchronize first before final tuning. I would prefer that you used a liquid style manometer / carb stick to set the carbs. As soon as the bike starts, quickly synchronize the carbs to at least get the bike running halfway decent. After it gets to operating temp, then finalize the synch. I don't think that you setting the mixture screws at 1 3/4 of a turn is enough fuel either, hence the hard start, along with the synchronization goofed up.

There are many questions that I have for you, so I can get you really close to the perfect tune before reinstalling the carbs.
Are you absolutely sure all 4 holes of the slow speed/pilot/transitional circuits are free and clear, with the mixture screws removed?
Did you remove the air cut valves to be absolutely sure that all of the pilot circuit ports and vents were free and clear? Plungers moved freely?
If you replaced the float needles, are the floats set at exactly 7mm?
Are your mixture screws the "D", Philips, or flat blade style?
I see that you're from the Netherlands. Do you remember what size the pilot jets and main gets were? ABS model?
Are you at elevation, or closer to sea level? General riding weather conditions and temperatures?

Don't bother thinking of the idle drop procedure right now ( I found a better way ). If you don't have the tools, you won't be doing it anyways...
 
Don't bother thinking of the idle drop procedure right now ( I found a better way ).
Do tell! I have the tool and a spare set of carbs to help locate the places to put it but, if there is a better way I'm all ears.
How do you measure for 50 rpm drop for instance.
 
Hi All!

Finally, finally I got to the solution. I decided (after the engine could only kept running while I keep the throttle more or less engaged) to order the slow jets and replace them with #40 instead of the standard #38 ones. Way difference!! OMG what a difference this makes... So, I replaced this afternoon the new slow jets that were delivered yesterday. I already did the float needles and last time I already set them to 7mm (were all over 10mm or so) and checked them again this afternoon: they were still all 7mm. So, no change there. Then I set the idle drop screws for all carbs and they are now all 2 turns out (from (loosely) fastened).

I decided also to setup everything up as normal as possible and add the air filter compartment. Because I removed the PAIR system (obviously this is an American bike otherwise I didn't have to bother) I also closed the air filter hole at the front of the air filter housing. When all was again back on the bike I moved it outside my garage and gave it a try ... It started immediately so I decided to let it run until warm (I heard the coolant fan kick in) and I then synchronised the carbs. As you can see it's quite successful, however I didn't tried it on the road. That I'll do in a couple of weeks time as I have no time in between to bother with this motorcycle (work, work and work). I'll update you all by then. I've also a movie that shows the first start of the motor cycle but it's too big to add it here. I share it here (until 6/30/2025): https://1drv.ms/v/s!Am7MBfkgWNDf_z5HsqfYpiSfJivW?e=QXFJPc

Hopefully you can see and comment (where necessary).

Thanks all of you as I couldn't do this all without your help (especially the carb cleaning part).

Below picture is the carb synchronising picture...

IMG_5823.jpg

Thanks again,
Willem.
 
This is great to hear Willem! I think you should be ok with the mixture screws at 2 turns out from seated, using the #40 pilot jets. I'm guessing your elevation and weather patterns are similar to ours? Congrats on a good running ST! I tried your link, but I do not have a Microsoft account to sign into. I'm all Apple...
 
Do tell! I have the tool and a spare set of carbs to help locate the places to put it but, if there is a better way I'm all ears.
How do you measure for 50 rpm drop for instance.
I used to do the Honda specific idle drop procedure years ago when I got done with a set of carbs. There are a couple reasons why I've abandoned it. First is that it leaned the idle mixture back to similar OEM spec(just a tad richer), plus it didn't keep the carb adjustment uniform the way I like. I have a Fluke 88 with the RPM inductive pickup. It'll read down to 1 rpm. It is also very time consuming keeping an eye on the tachometer with precision adjustments. It takes roughly an hour to set the carbs. I’ve had a lot of practice! The first one I ever did took hours. The bikes ran great afterwards, but there had to be an easier, quicker way.

After some study, talking with some top notch tuning guys and experimenting with my non-emission / non-ABS bike, plus the two ABS bikes my boys have, I came up with a great alternative. A one week experiment…

I have a Morgan Carbtune, plus the Honda “D” shape mixture screw tool. I set up the tuner, as to synchronize the carburetors. All carbs have been set at 1 3/4 turns out. While at operating temp, I sync the carbs and set the idle speed to 1000 rpm. I then start at #4 carb mixture screw. On the ABS bike, #4 is a total bastard to get at. The throttle cables, frame and throttle bell crank make it just about impossible to reach. You’ll need a coat hanger with a bent hook at the end of it for help getting the tool into the screw bore(s). You’d figure that #1 would be the worst, but that #4 will make you talk to yourself. Non-ABS bikes are certainly easier. I turn the mixture screw out very slowly until maximum VACUUM has been achieved. Then in and out to find maximum vacuum. Adjusting idle speed along the way if needed. I then repeat with the other cylinders, do #2, then over to the other side of #1 and #3. Again, adjusting for maximum vacuum. I then re-synchronize the carbs and finish up, setting idle speed to 1000 rpm’s.

Remember to have a big fan aiming at the radiator to prevent the cooling fan from coming on. When the fan comes on, the additional electrical load placed on the alternator will drop the rpm’s and screw up (drop) all your readings. DONT make any changes if the fan comes on. Wait for it to turn off. This includes setting both the mixture screws and the synchronization.

When done, you’ll find that the mixture screw turns will all be in the relative same place. Pending on the bike, jetting, changes in jetting, you may see all screws around, 1 3/4 turns, 2 turns, 2 1/4 turns, 2 1/2 turns. All depends on elevation and average temperature, etc. I helped a guy in Dubai, who ran exclusively in the desert. 1 1/2 turns and I felt it was still too much, but he liked the way it ran.
Less complicated and faster to do? Yes. Is it really easier than idle drop? Maybe...;)
 
Now, this is very valuable information! I knew vacuum is important, but that you can read so much information from vacuum readings in combination with idle mixture it's just an eyeopener for me. Now, having said that I'm planning to adjust the idle drop next weekend. This weekend is planned with stair painting activities :)
As the bike runs very smooth now and the carbs can be easily synchronised (as you can see in the picture in my earlier message) I'm quite eager to see how the idle drop procedure will go from my end. I'll check tonight if I can get to the idle mixture screw with my newly bought bended screwdriver. The idle mixture screws are de D-shaped screws, which I have changed (with the aid of my Dremel) to screws that I can now use with a normal screwdriver. I also have a bend (90 degrees) flat screw driver which I will test to see if I can reach the screws easily. We'll see and I will update here as well. Thanks Adam (afrymoyer) for your valuable information on the idle drop procedure (and of course all other friendly comments and suggestions).
 
When I went through my carbs I check to see what my screw setttings were at that time. So, when reassembled I set them to those initial settings. I do use the motion pro screw drive gives a bit more flex ability to access the scrwes. As for sync the carbs I the Pro-Diagnostic Dsync2. Just need a laptop but so much quicker than you gauges. Very effecient, typically less than 20 minutes to sync carbs. Assign your base carb (#4) and adjust accordingly. The inpulse bands you can use to adjust fuel/air ratio as well as reconigize whether you have a possible cylinder/valve issue as well. The image is of my carbs once completed.
 

Attachments

  • 1737833103433.png
    1737833103433.png
    111.6 KB · Views: 18
  • 20230416_102650[1].jpg
    20230416_102650[1].jpg
    159.3 KB · Views: 18
Before I hand over the Honda ST1100 back to her owner I thought to upload this video I took as a second start attempt. But there's no way to upload any video to this forum (probably for a reason ;) She runs fine and as the owner wants to have a running machine so he can go to the Honda shop and find a more modern one (I heard ST1300) and get some money back for this machine. Secretly I fell in love with this old girl, but that is my problem. She runs fine and feels very happy back on the road. So, here stops my endeavor with this "old" girl. I want to thank all of you valuable people with my endeavor to get this bike sorted and back on the road. A big thank you to all of you and especially to Adam @afrymoyer who's contribution really helped me! Thank you!
 
Thank you Adam! I certainly will! I'm very grateful with your help! I watched Youtubes on idle adjustment and I got mixed feelings when someone says: turn it until you hear the bike running at her best. Come on! You are the only one that pointed me on the value of vacuum on a motorcycle as I'm not a motorbike mechanic from origin. In short I watched a lot of videos which brought me nothing. Once I knew vacuum is the secret of a perfect running (carb powered) engine I'm more comfortable to work on this kind of (older) bikes. Thanks again! And yes! I will GO RIDE!!
 
Back
Top Bottom